As a student - or any busy professional - can attest, keeping track of tasks can be a nightmare. Besides simply tracking when tasks are due, it is often helpful to track the priority of tasks, different categories and labels, or even tracking dependencies between tasks. The possibilities are endless - and most organisational systems (including your memory) can’t handle this. Having a fully fledged, customisable dashboard for tracking and organising your tasks is now possible with software such as Notion. With Notion we can treat all our tasks as items in a database - like an Excel spreadsheet - which we can manipulate at will. In this post I will guide you through building your own workflow for productively tackling tasks and automating away the burden of mentally tracking your priorities. This ties into the idea of having a second brain. Stay tuned for more on that in the future. If you simply want the end page as a template, here it is.
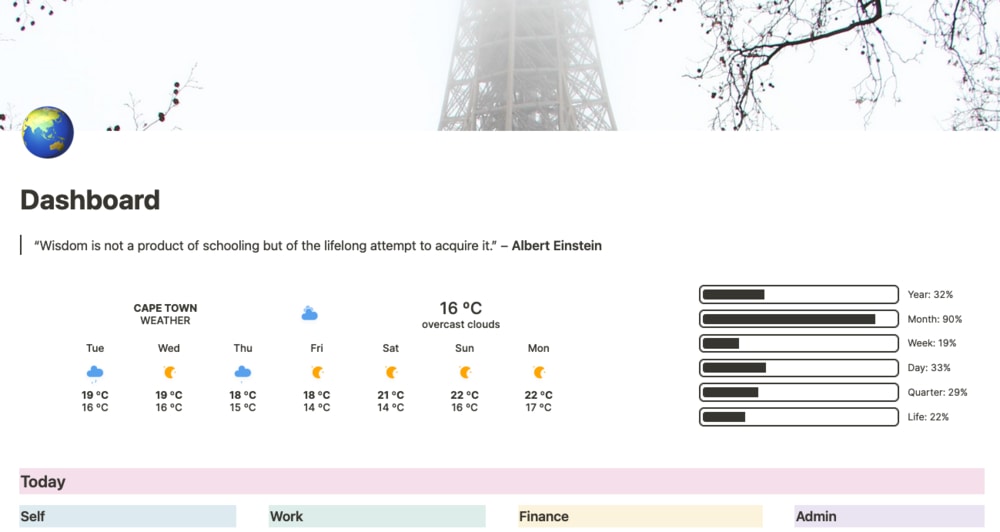
What is Notion?
If you work in tech, you’ve probably already heard of Notion. This startup recently hit a valuation of $2 billion and is growing at a (sustainably) fast rate. It is a very interesting piece of software, available as a service, which aims to be a hub for all your information. Succinctly, Notion is an all-in-one productivity platform that let’s you link databases and manipulate how these databases are viewed. Now that doesn’t sound very appealing at first, but this database structure allows almost limitless options for the presentation and organisation of your data. Want to create a holiday planner? Easy. Need a Kanban style workflow for a sprint product backlog? A view is available for that. Dreaming about an efficient and scalable workflow for capturing, organising, and tracking your research? We’ll get to that. The beauty of this is that everything in Notion is searchable, always available online, and improving over time.
Creating a Basic Page
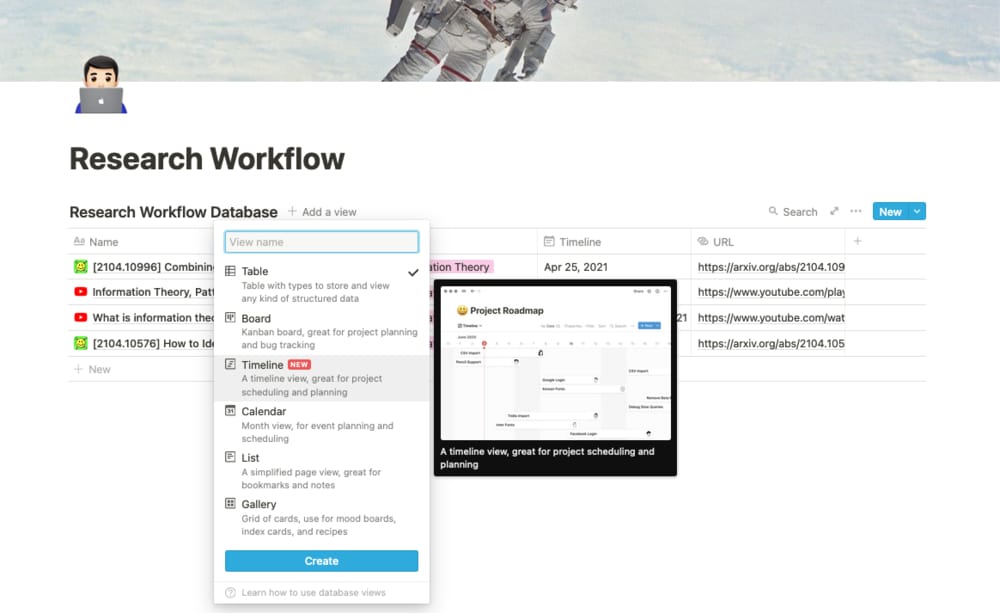
In Notion everything is treated as an entry in a database. This includes pages that you create. To create your first page simply open the side menu and click on the New Page icon. From here you will see a default page with options to create an empty page or use a template - including this one! You will also be able to see the six available database views. These include an Excel-like Table, a Kanban Board, a List, Calendar, Gallery, and the newest addition - the Timeline. My favourites are the Board, Table and Timeline. Experimenting with what works for you will serve you well in your work, so play around!
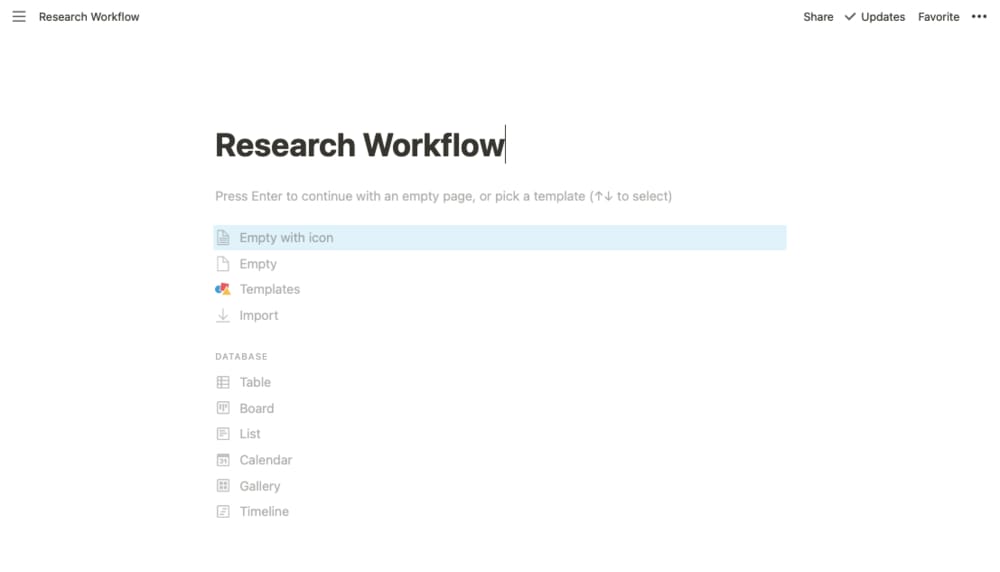
Let’s start by creating an “Empty with icon” page. We can then add a cover image, a page icon, and add our first Block to our page. Blocks are just any element Notion let’s you insert inline on your page. We can do this by using the \(/\) command and selecting an option. Here I will insert a basic “Inline Table”.
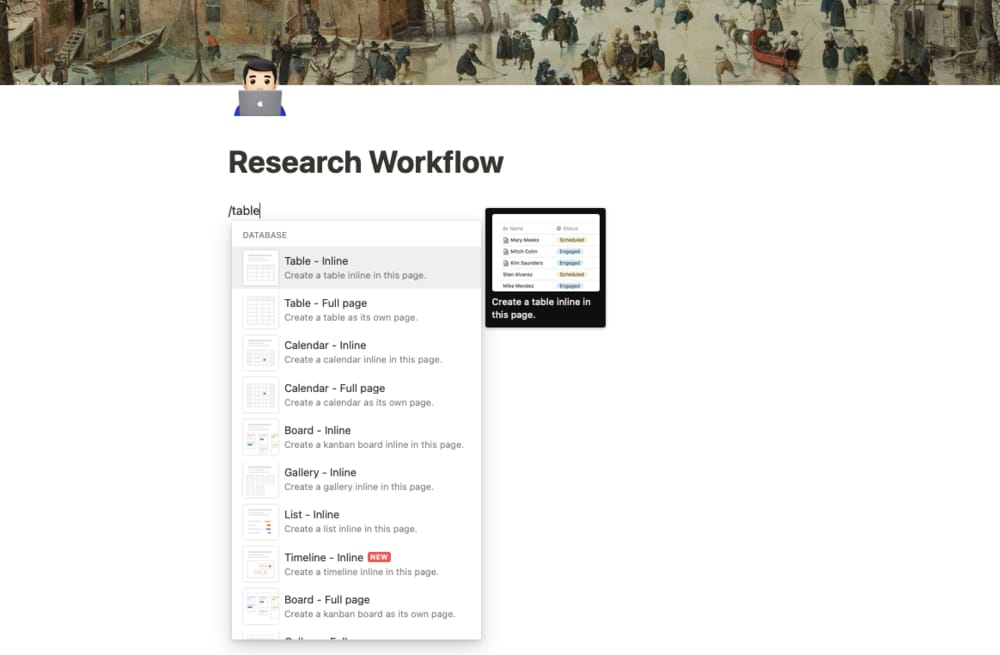
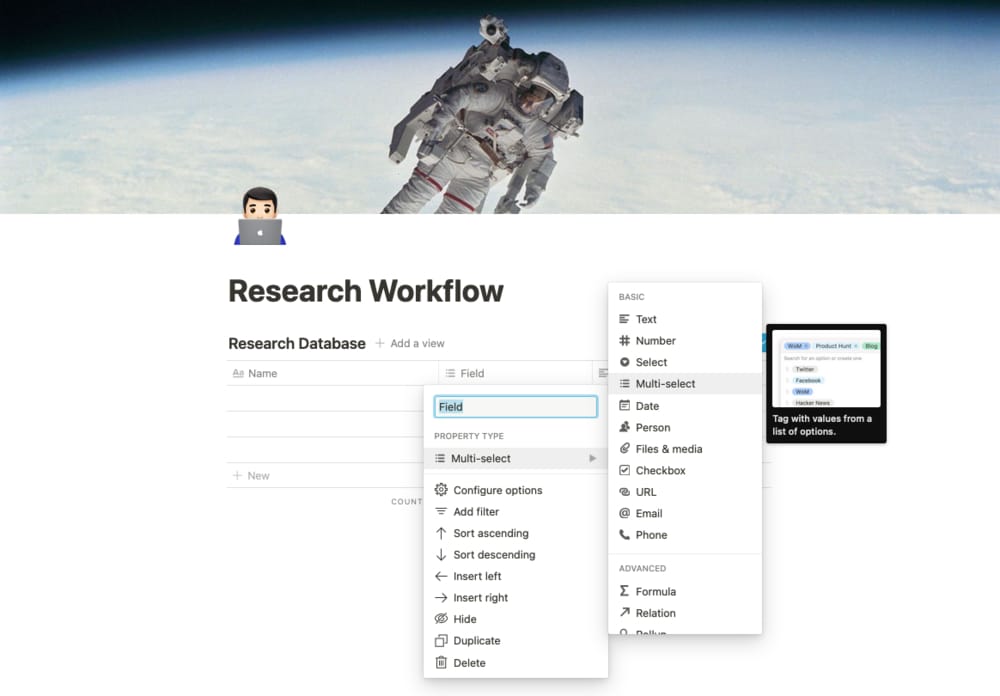
From here you can start adding columns to define the properties we want each element of our database to have. For example, I will add “Field” and “Timeline” columns. We can also choose the type of the properties. Here “Field” will be a multi-select. This let’s us enforce options so that we can later filter more easily. Timeline here can be a “Date” type - very useful for the timeline view we will discuss later.
Capturing Content
Perhaps the most important part of making an efficient workflow is enabling a quick, easy, and useful capturing method for articles, blog posts, media, and any other content you wish to index. Notion has this problem covered with their Notion Web Clipper browser extension. This is a great tool, but I have found that using the Save to Notion tool is usually better. I like to keep both available. This allows you to create custom forms for importing different kinds of data. For example, for my research capture form I have entries for which subject and area of research the content is for, who wrote it, what rating I give to the content (if I’ve already read it), as well as a status and timeline for assigning a priority status for when I should to read it. I have default values set for everything possible, which makes automating the assignment of content to the correct area of my database a breeze!
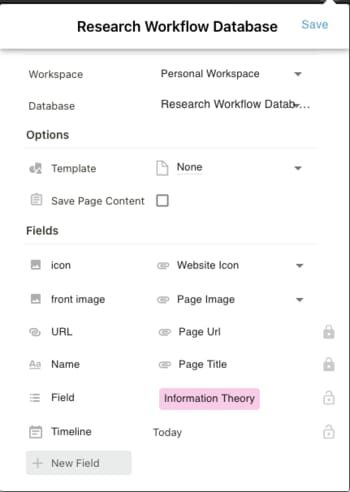
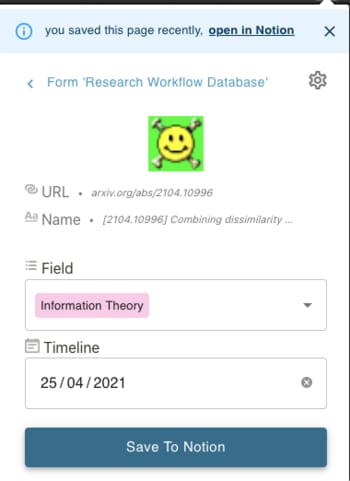
Let’s assume we’re researching Information Theory and have found an arXiv article we wish to store in our database for note taking, tracking and organising for later review. In this case we are interested in Zheng and Jiang’s Combining dissimilarity measure for the study of evolution in scientific fields. Heading to this page, we can click on our Save to Notion extension and create a new template for adding items to our Research Workflow Database. Once we have done this, we can now import this arXiv article directly into our research database.
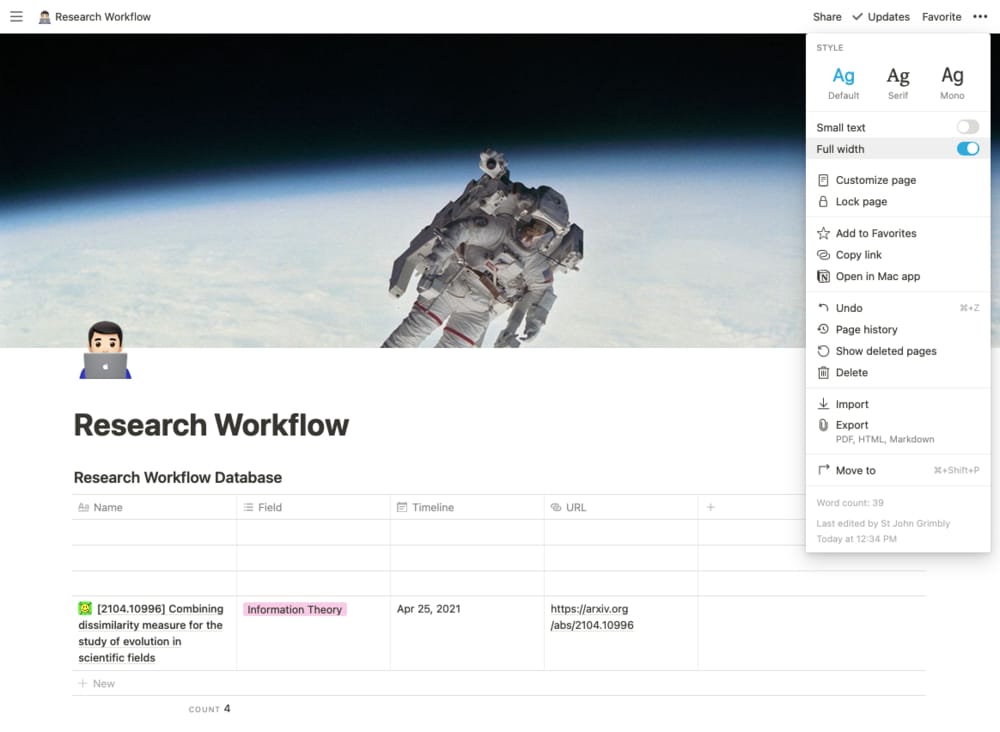
Heading back to our Notion page, you should now see your entry in the table. I like to set my pages to “Full width” so that the tables stretch across the page. This gives you a greater view to your table without having to scroll horizontally.
Let’s go ahead and add a few more items to our database. I like to turn the “Wrap cells” table setting off. This ensures that each table entry has the same vertical height, ensuring a cleaner look for your table. Of course, feel free to customise this at will.
Custom Views and Linked Databases
We’ve already briefly discussed the idea of views in Notion, but it is hard to overstate how powerful this is. In a research database for my reinforcement learning research, I use multiple views to change to change the focus and presentation of my content to suit what I’m trying to achieve. I especially enjoy using a timeline view for managing my workload over a work week. I also find the Kanban view useful for tracking the status of work and prioritising my research backlog.
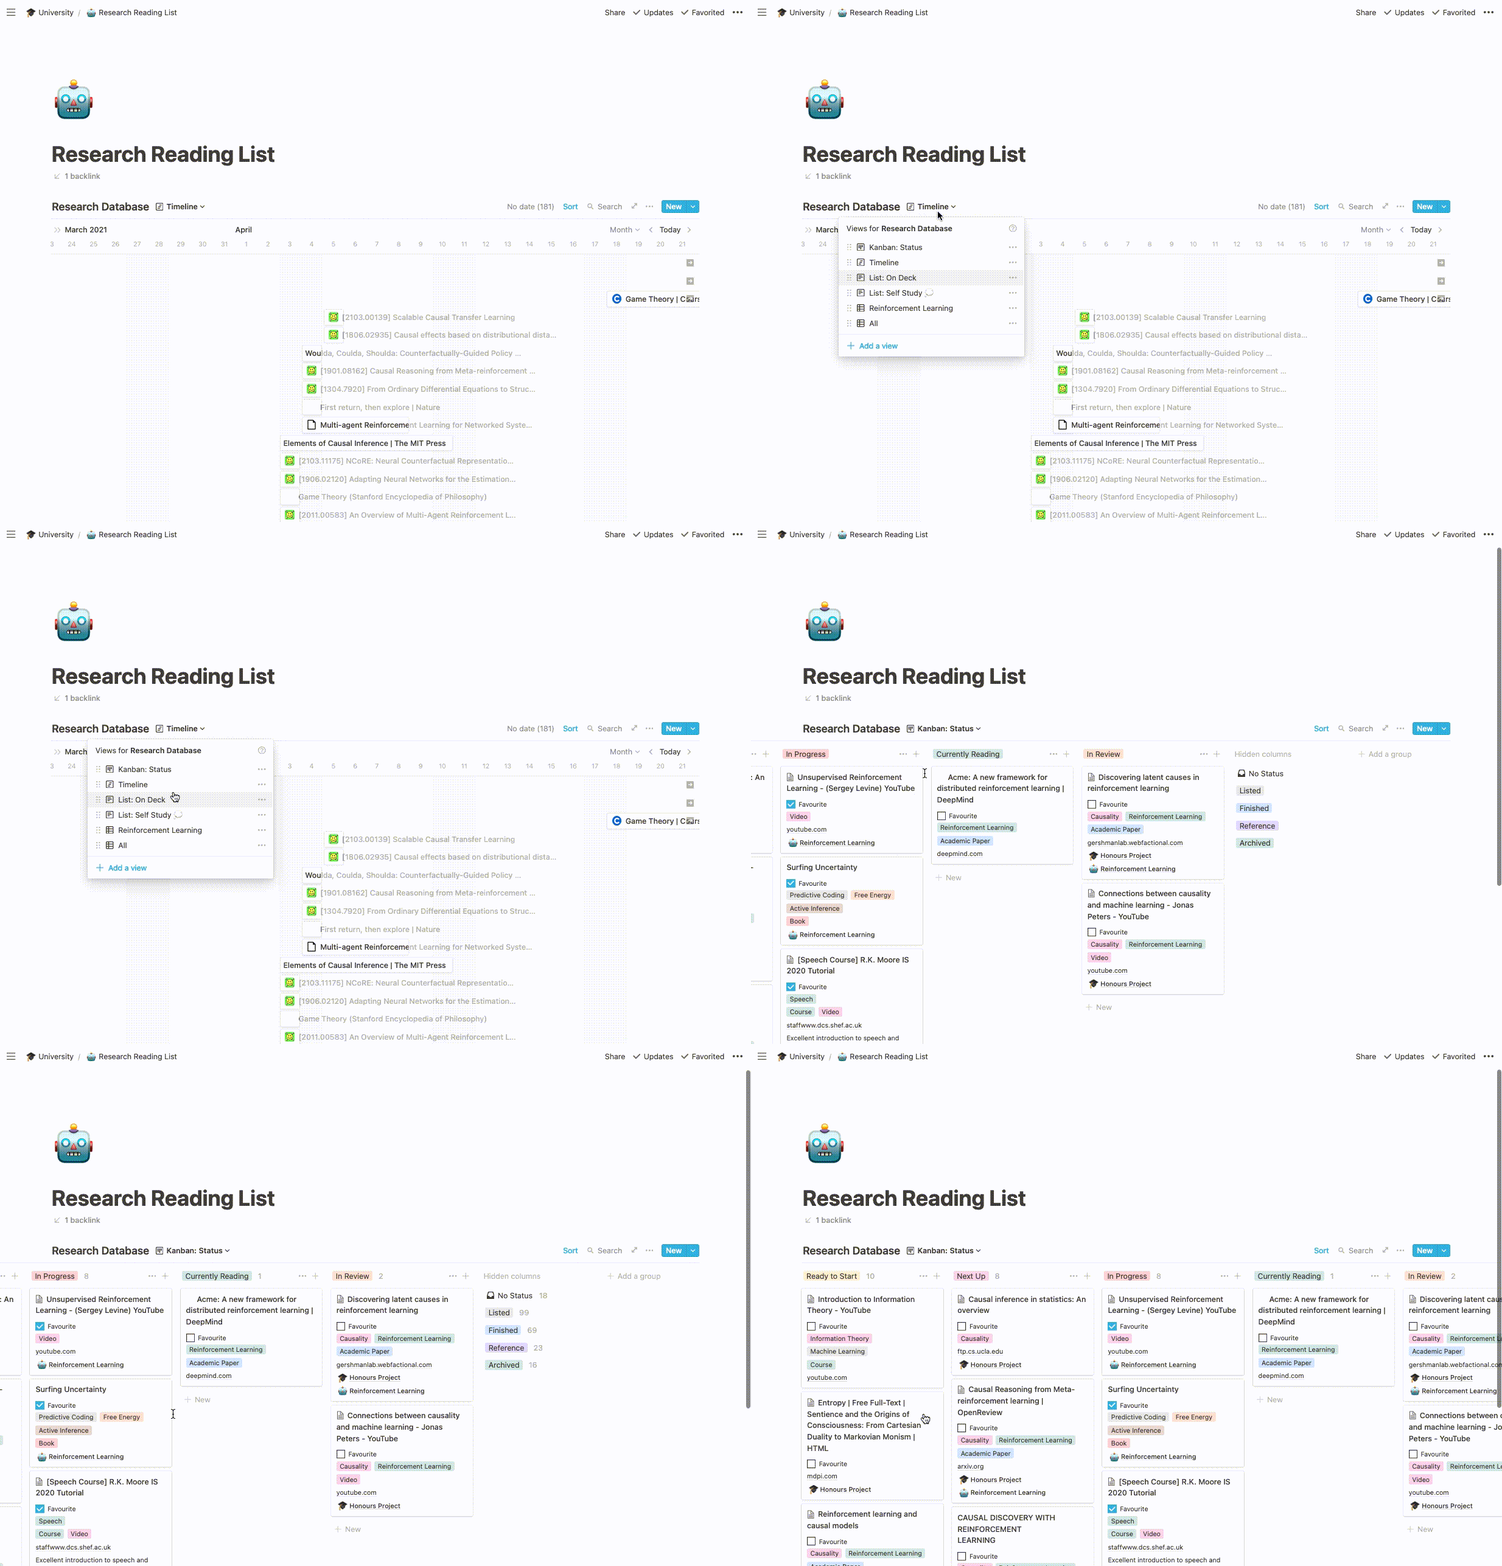
Let’s see how we can add views. Next to the title of your database, you’ll see the “Add a view” button. Here we can select Timeline view. From here we can manage our workload by dragging elements forward or back in time. And that’s it for basic workload management. Of course, there are many more useful features for organising what and how you see your content. You can imagine how messy a database can get over time as your database grows. Let’s automate the process of cleaning this up.
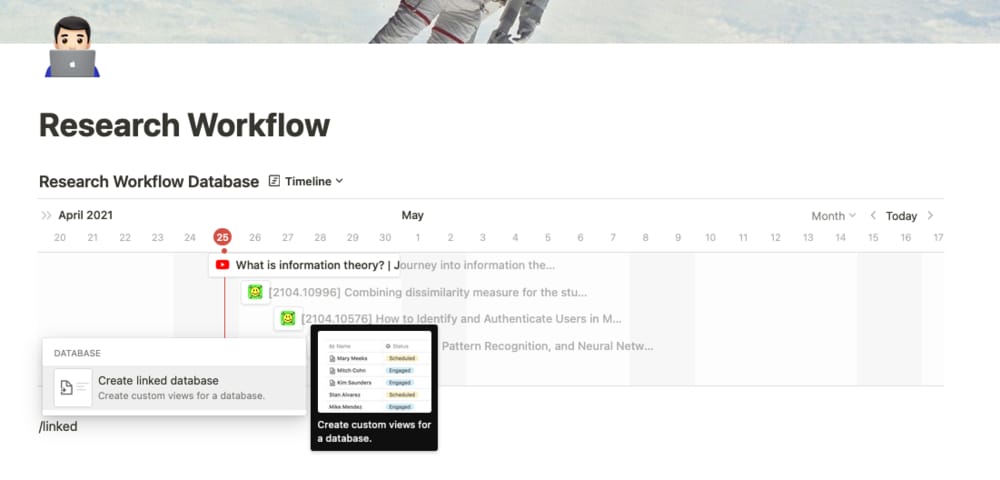
You might be wondering, can I see my multiple views at once? The answer is yes. This introduces the idea of Linked Databases. What we can do is add a new block by using the \(/\) command and typing linked. From here you can search for your Research Workflow Database (the name of your table) and change the view to your desire.
Filtering and Sorting
One of the most powerful features of having every element be searchable and have strict properties is that everything is easily filtered and sorted by any criteria you can think up. Let’s add a filter to only see our Information Theory content that is due on or after the current day. We can also add a sort to order the content by deadline.


Wrapping up
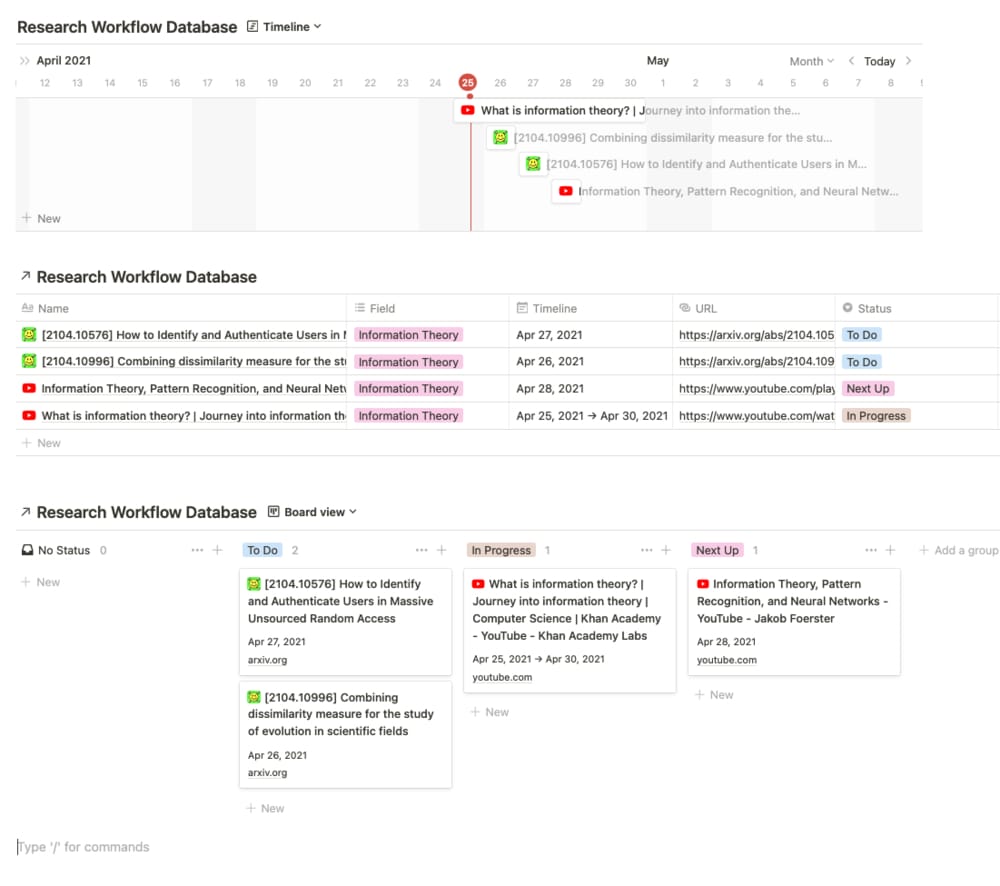
With linked databases, custom views, filtering, and sorting, we have the tools for a powerful, but basic, research workflow. Ingesting web pages, articles, YouTube videos, and custom notes is easy with Notion clippers. At this point your page could look something like this, where I’ve added two linked databases; one with a table view and another with a kanban board view. Things are taking shape!
There are many routes to explore from here. Using custom templates, linking different databases together, adding custom widgets (such as those on Indify), and embedding web content is all possible. In fact, Notion is also great for collaborative team work. There are built in tools for sharing and controlling permissions with people in your team.
A word of warning: be sure to backup your important data. Whenever data is centralised (as in our databases) we are at risk of losing information if the service goes down. Notion offline support is not great to say the least. Hopefully this improves in the near future. The notion API is also going to be an interesting opportunity to completely customise how your interface with your data. Imagine writing scripts to automate linking your different note taking platforms together. This is quickly becoming a reality.
With that said, let me know if you’d like more content on developing a Notion ‘data ecosystem’ and second brain - or any other content for that matter.
 St John